

Those who know me know this: I reeeally like pictures.
I love incorporating them into my gifts to make them personal and memorable. My usual go-to is to choose a great picture, buy a frame, sit down with a magazine or two, cut out some fun quotes and place them strategically all over the photo for a little warmhearted good humor. But this year I wanted to go the extra mile for my boyfriend Benjamin’s 30th Birthday. I’m not sure if I was searching the internet for inspiration or if it was just serendipity, but I somehow stumbled across this gorgeous instagram-themed advent calendar by The Thinking Closet (just found her blog and am totally digging it!). I saw that they sold the frame kit online (no stores carry them here in Houston—believe me, I checked!) but as the semi-procrastinator that I am it was way too late to be wasting time waiting for the mailman, so I had to just buckle down and make one myself. This allowed for some special modifications like including real mini-clothespins (which he loves), and making a frame with 30 pictures rather than 25.
So here’s a step-by-step of how I made THIS beauty:
~~~~~~~~~~~~~~~~~~~~~
Los que me conocen saben cuánto me encantan las fotos.
Me gusta incorporarlas en mis regalos para que sean mas personales y memorables. Típicamente elijo una foto super buena, compro un marco, y me siento con un par de revistas a recortar palabras y frases apropiadas (y a veces sumamente esporádicas) para esparcir un poquito de cariño con humor. Pero en esta ocasión (el cumpleaños número 30 de mi novio Benjamin) quería saltarme la barda. La verdad no recuerdo si estaba en busca de inspiración cibernética o si fue pura suerte, pero de alguna manera me topé con ESTE hermoso ‘advent calendar‘ estilo instagram. Vi que venden los juegos con marco alambres y clips en linea (no los tiene ninguna tienda aquí en Houston; créeme que revisé!) pero como suelo hacer todo último momento, eso de estar esperando al cartero no iba a funcionar, así que me puse las pilas y me lo hice yo. Esto permitió que hiciera unas modificaciones especiales como incluir mini-pinzas de madera (que le encantan) y cambiar la cantidad de fotos de 25 a 30.
Asi que ahí les va paso por paso, cómo hice este instacollage:

~~~~~
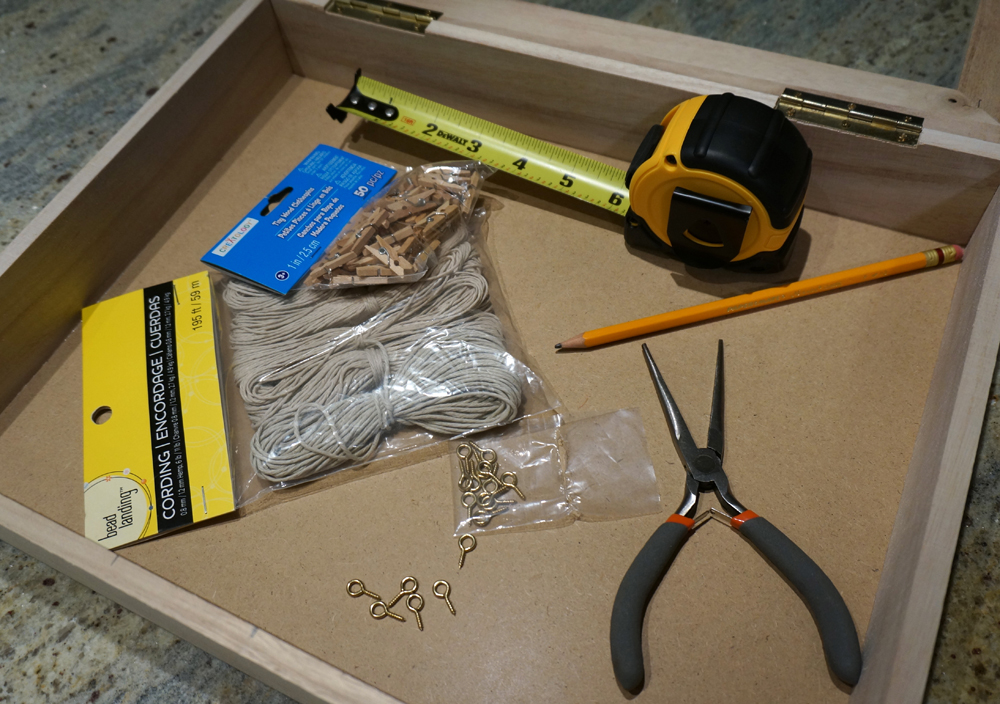
Lo que hay que comprar para hacer el marco (todo de Michaels)
~~~~~
Todo lo que vas a necesitar para el marco
~~~~~
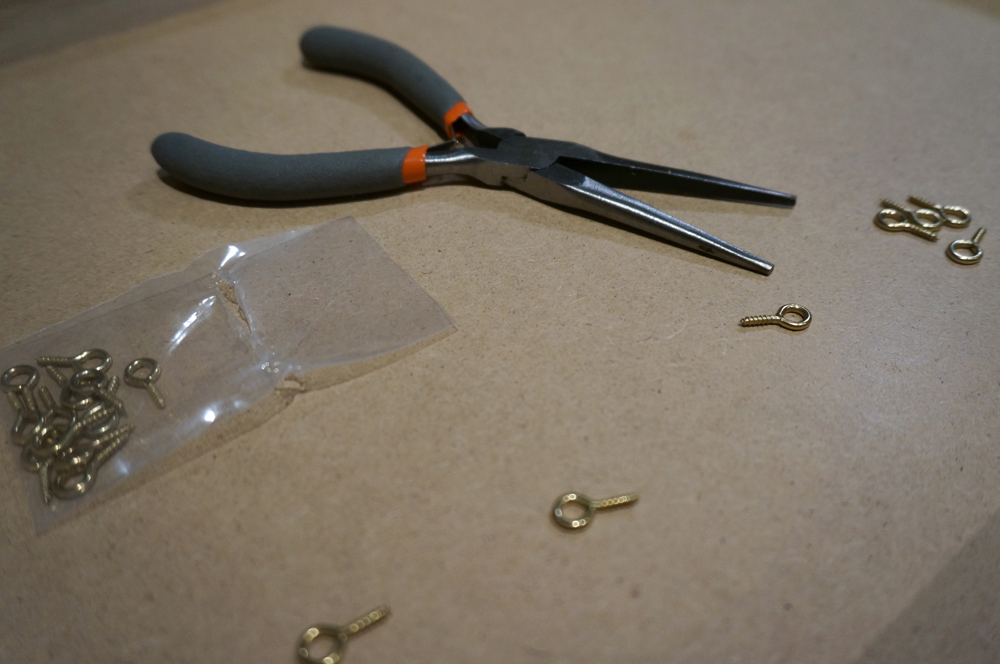
Elige un marco con madera suave – vas a estar atornillando con tenazas o con la mano!
~~~~~
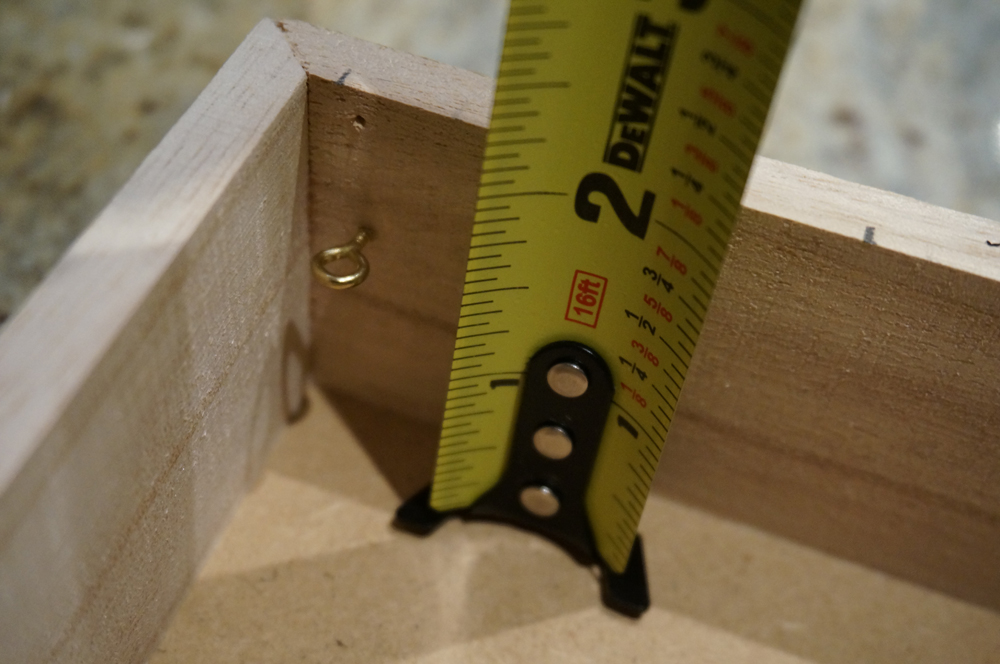
Usa tu cinta métrica para dejar espacios uniformes entre tornillos. También asegúrate que todos estén a la misma profundidad.

~~~~~
Aqui dejé poquito mas de 2 pulgadas de distancia entre cada uno

~~~~~
Ya que estén todos los tornillos, es tiempo de amarrar la cuerda

~~~~~
Que quede lo más ajustado possible

~~~~~
Ya casi está el marco!

Choose 30 of your favorite pictures from instagram (or anywhere else, really). I chose 65 because narrowing things down is not my forté…
~~~~~
Ahora vamos con las fotos:
Elige 30 de tus fotos favoritas de instagram (o de cualquier lado). Yo elegí 65 porque eso de decirle ‘no’ a una foto como que no se me facilita…

I changed all mine to 300 pixels/inch and then changed the size to 1.8 inches.
~~~~~
Primero, asegúrate que todas las fotos sean cuadrados perfectos. Después, modifica su tamaño usando photoshop.
Yo cambié todas las mías a 300 pixeles por pulgada y de ahí cambié el tamaño a 1.8 pulgadas.

~~~~~
Crea un documento en photoshop con las medidas de una hoja de papel (8.5x11in). Copia tus imágenes una por una y pégalas en el documento. Estas son las hojas que vas a imprimir.

~~~~~
Ya que tus imágenes estén impresas, es tiempo de cortarlas! Ten mucho cuidado, es posible que para este paso las tijeras sean mas efectivas que este aparato.

~~~~~
Vas a necesitar papel tipo cartulina en blanco. Y en negro si te gusta tener opciones.

~~~~~
Corta la cartulina en cuadros mas grandes que las fotos para que se vea el marquito alrededor. Yo corté cuadros de exactamente 2 pulgadas.

~~~~~
Pega las fotos con la cartulina. Yo utilicé cinta adhesiva.

~~~~~
También hice unas fotos con fondo negro para tener un poco de variedad.

~~~~~
Empieza a colgar tus fotos en el tendedero!

~~~~~
30 fotos en su máximo esplendor

~~~~~
Cuando estés listo para ver fotos nuevas, puedes intercambiarlas fácilmente.

~~~~~
Hay tantas memorias representadas detrás de este vidrio!


Learn from my mistakes:
1. Leave a little extra room on top for the clothespins to stand up straight.
2. Leave a little extra room on the sides to account for the thickness of the frame around the glass.
3. Do NOT waste your time going to print your pictures at Kinko’s. Even after all my hard work formatting the photos, making them exactly the right size and putting them on a regular paper-sized document they COULD NOT figure out how to print them for me. (Isn’t that what they are supposed to DO there?) I ended up printing them off of the most basic program in the world (Preview) at my boyfriend’s office.
4. Give yourself a little extra time to have everything ready on time 😉
~~~~~~~~~~
Aprende de mis errores:
1. Deja un poco de espacio extra en la hilera de arriba para que las pinzas puedan colgar verticales.
2. Deja un poco de espacio extra a los lados – hay que tomar en cuenta el grosor de el marco alrededor del vidrio.
3. NO pierdas tu tiempo tratando de imprimir tus fotos en Kinko’s. Después de todo mi trabajo ajustando el tamaño de las fotos y colocándolas en un documento del tamaño exacto de una hoja de papel, NO encontraron la manera de imprimírmelas. (No se supone que eso es lo que hacen allí?) Terminé yendo al trabajo de mi novio e imprimiéndolas allí en el programa mas básico del mundo (Preview).
4. Date un poco de tiempo extra para terminar todo a tiempo 😉


Oh my word, Holly, you are blowing my mind right now! I’m so impressed by how you took this project and RAN with it, making it your own, and totally being a DIY rockstar with your own frame, clothespins, and string. I love the black rimmed photos on the back…and how you can change it up when you want to. This is SUCH a special 30th birthday gift…and I can only guess how very loved your boyfriend felt to receive it.
With your permission, I’d LOVE to feature a photo of this project (with a link back to your post) with my readers in my next Reader Showcase. Showing off my reader projects is one of my favorite things in the world, and THIS definitely merits some showing off. Is that cool with you?
Hugs from Orlando, FL!
Oh my goodness I’d be honored, Lauren! Thanks so much for taking the time to check it out (before i knew it the post had become insanely long) and write me such a sweet message… I’ll definitely keep checking your blog I thoroughly enjoy your ideas and appreciate your positive energy 🙂
I love this!!! I use Kanvas (kanvas.com) to print my Instagram photos for me. Now I have a place to put them. Thanks! 🙂 Miss you guys! xo
My bad. It’s actually Kanvess @ kanvess.com. Oops! 😉
Hey Daneen… Thanks for checking out the blog. If you do end up making one of these, I’d love to see it!
Miss you! XO
This is so pretty and creative! Great idea Holly!
AMAZING, ERES TALENTOSA!